Zachary’s FROZEN party was a couple of weeks ago, and was a hit with everyone. I had a ball creating it, he had a ball helping me and his friends had a blast too.
This is a long post, but I wanted to capture everything I did complete with links to everything you will need to create your own Winter Wonderland or Frozen party. If you didn’t see part one, you can read about it here.
THE DECOR
I used Pinterest as a way of collecting inspiration and created a board dedicated to all things Frozen. You can see my board here.
Juggling many balls in the air, I started working on many of these items some time ago. I even squeezed in some time for trial runs of a few food items. The kids had fun helping me in the creation and the food testing department!
I could have very easily done so much more, but I have to draw a line somewhere! Time certainly dictates some of what gets included in events I host, but nobody knows what I had planned except me, so on the day nobody is aware of what didn’t get done 🙂
My Pazzles assignment featured on the blog last month was the start of Zachary’s Frozen themed party decor. I built on this as time went on.

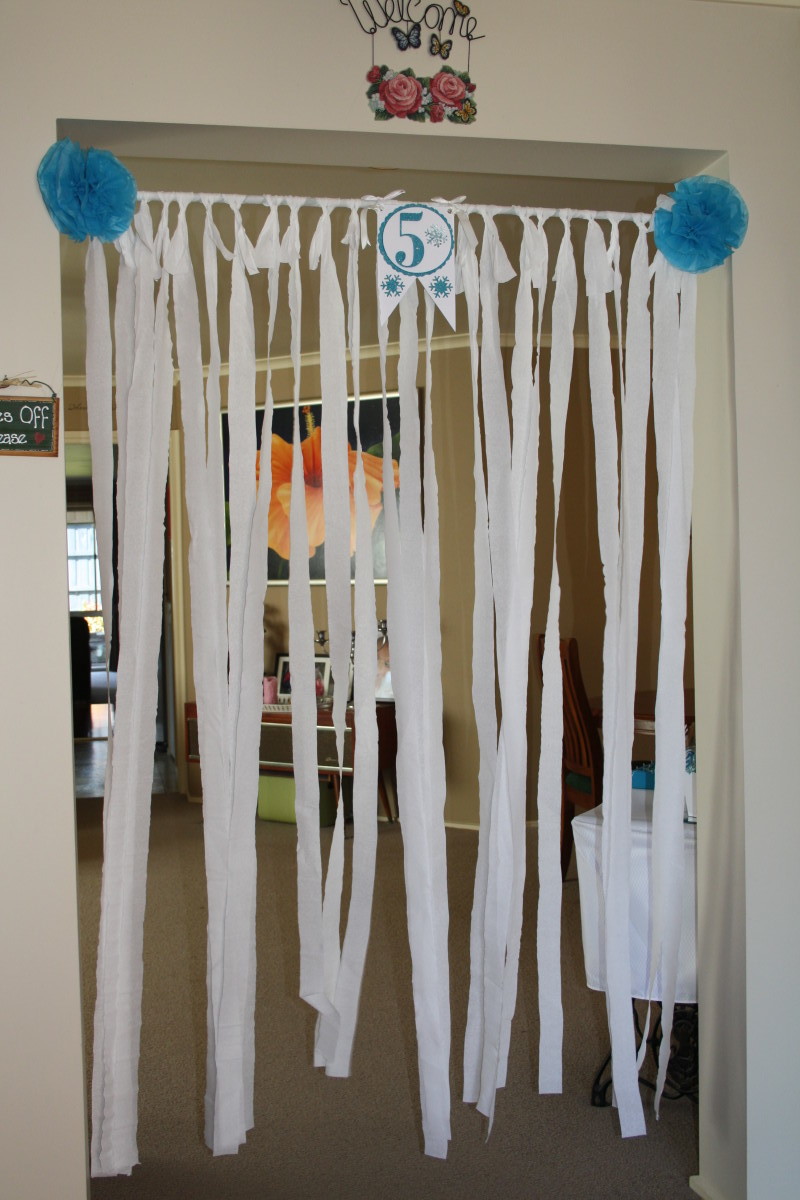
As the children arrived I had a white streamer curtain hanging in our entrance hall for them to walk through. They loved this! I attached the number 5 pennant pictured above to the centre of the rod and used two mini pom poms at each end.
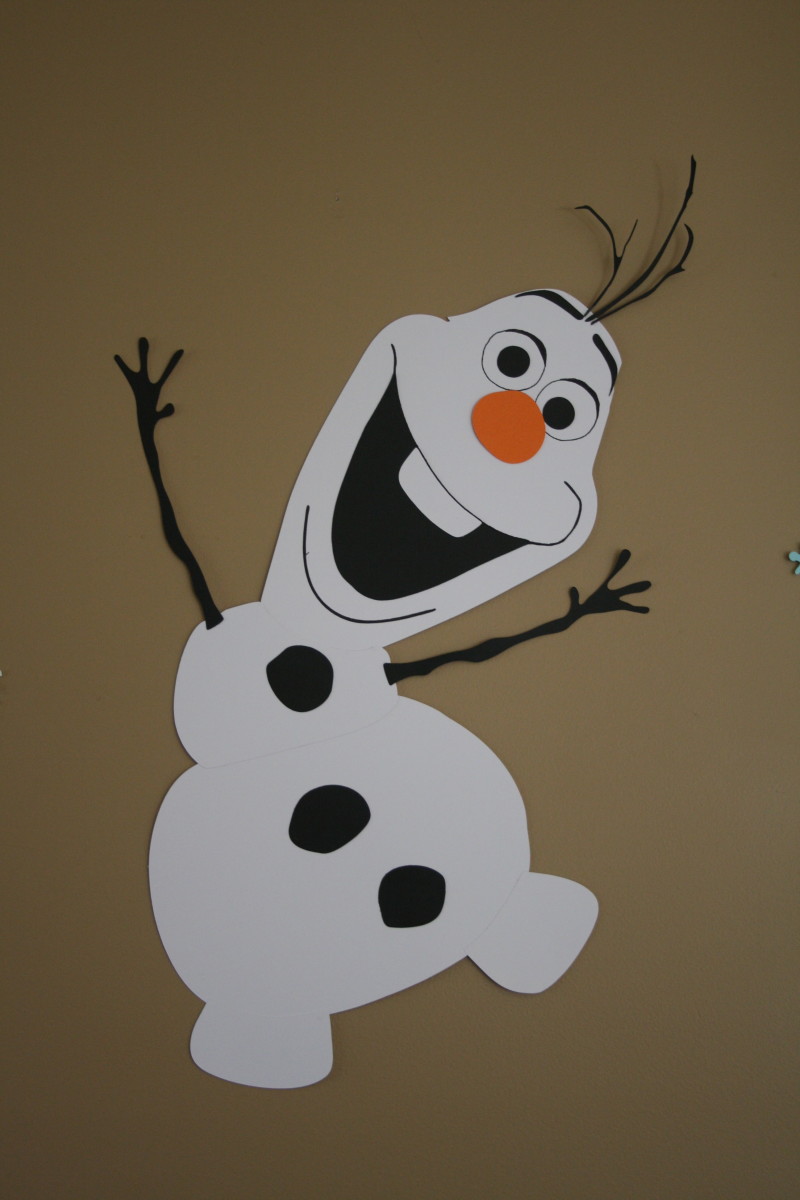
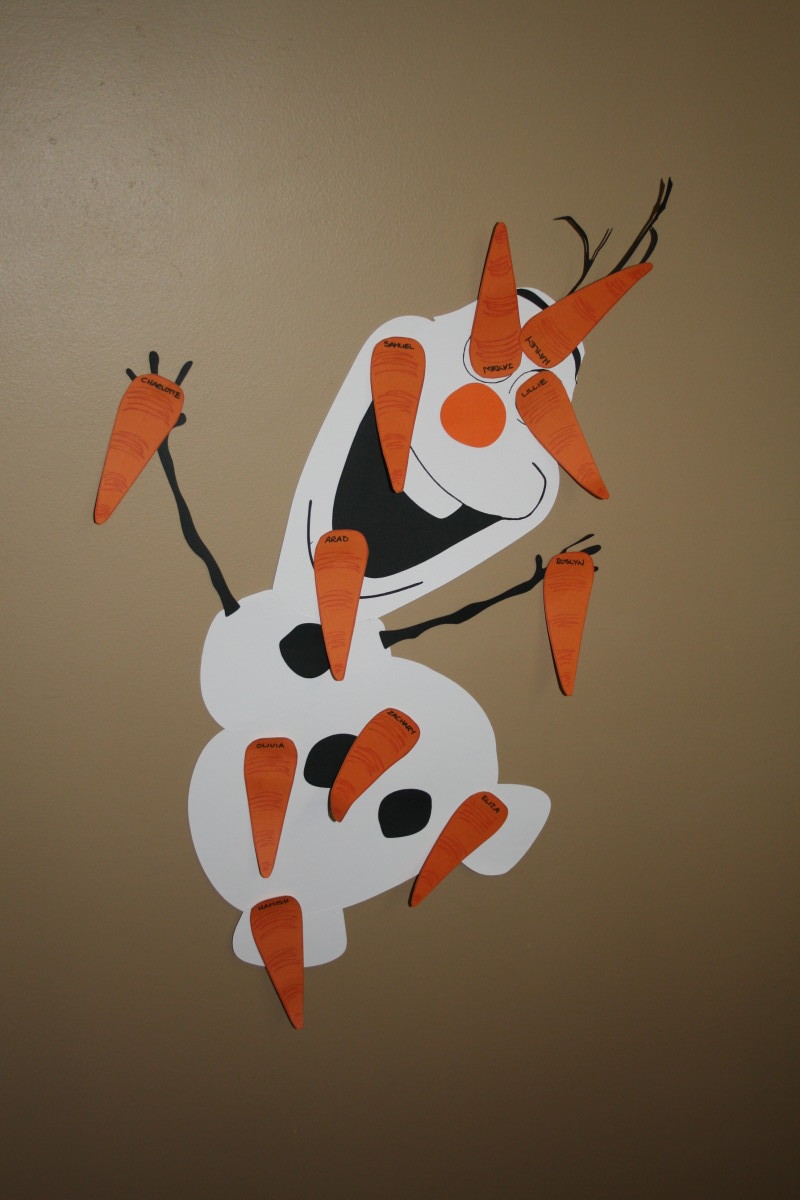
I wanted the kids to play pin the nose on Olaf, but the actual merchandise for that here is a bit tricky to get hold of. In my usual fashion, I thought “I can make that with my Pazzles!”. So I did! I used a colouring sheet of Olaf and vectorised it in my Inspiration Pro software. I made each piece as big as I could and cut out each section to then be assembled for the children to pin the noses to. I found a printout of Olaf’s noses and printed these onto orange cardstock and cut out freehand. After writing each child’s name on each carrot and attaching Olaf to the wall, this game was ready to go. Olaf is now on Zachary’s bedroom wall with just one carrot stuck to his face.
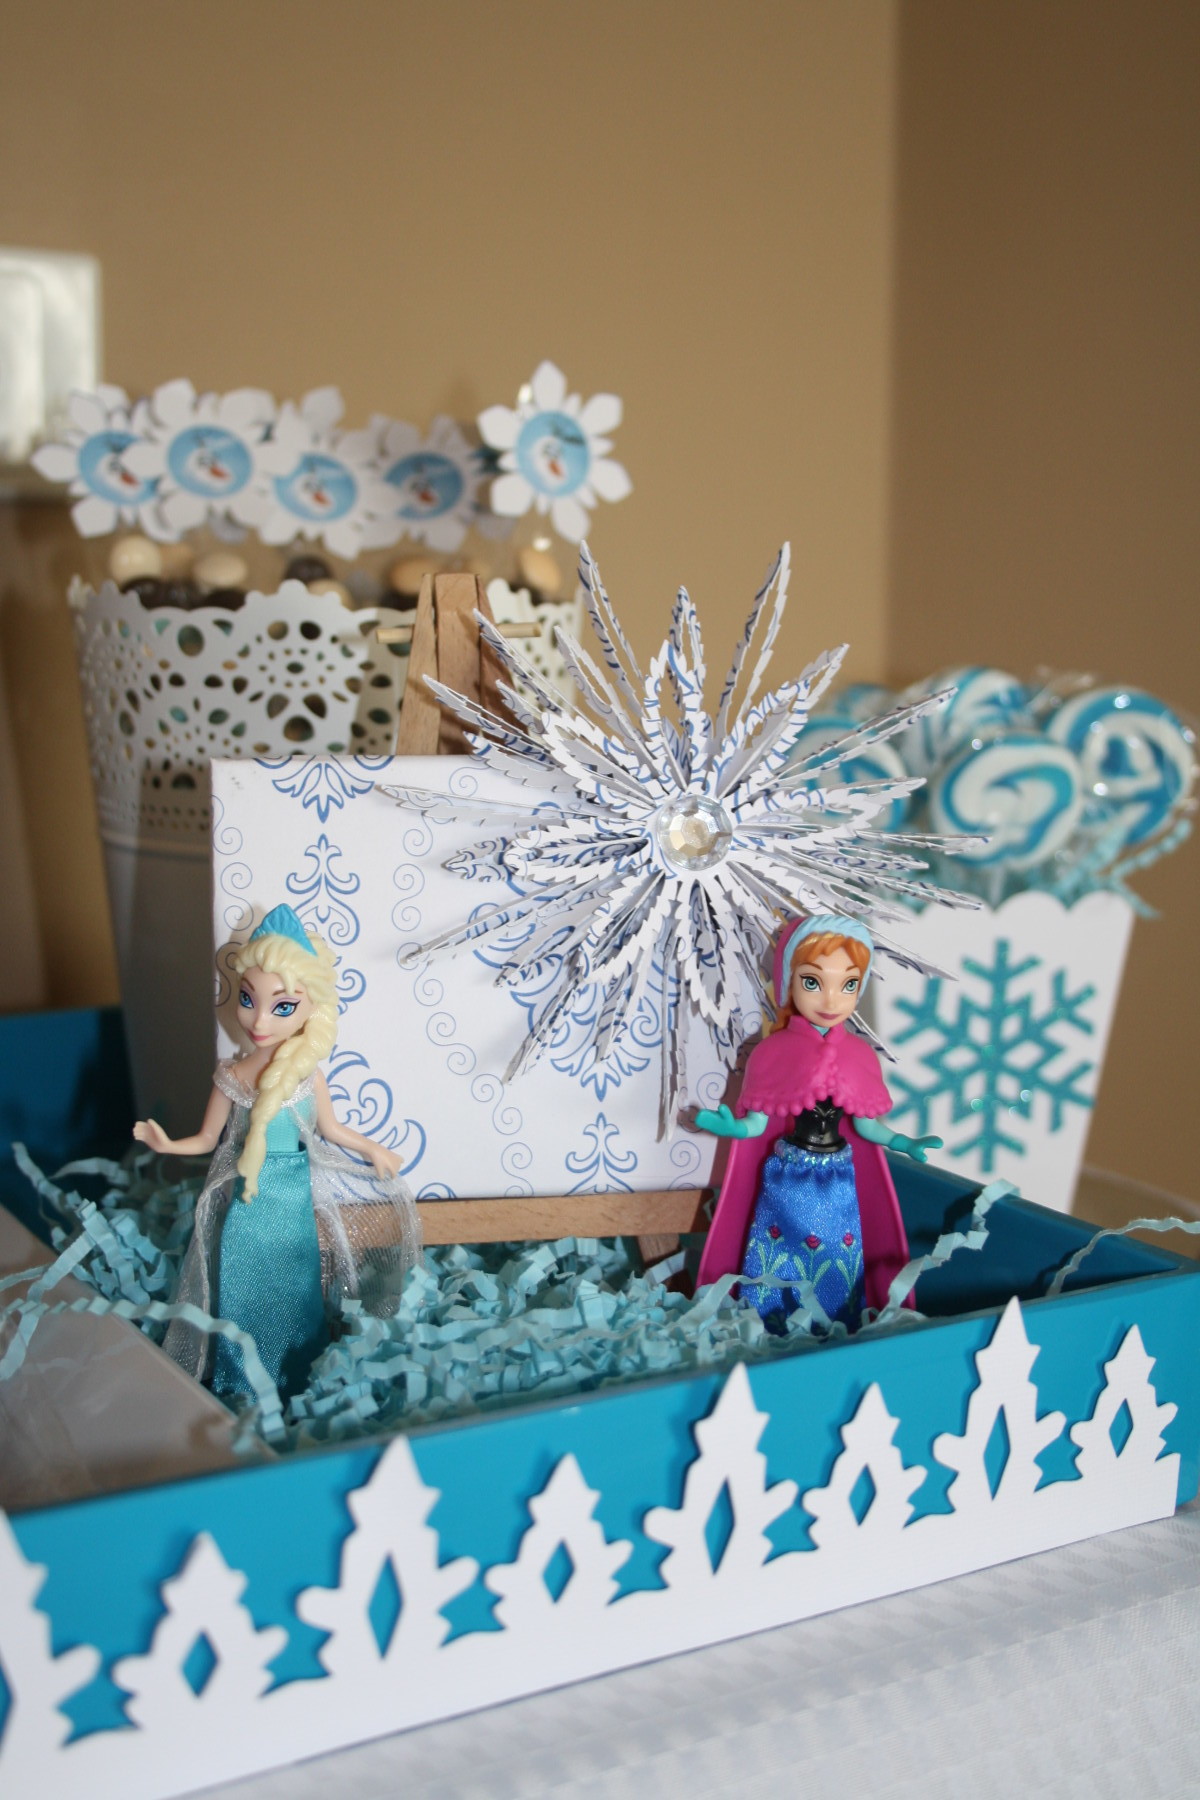
A really easy and fun project Zachary and I did together was to create a paddle pop snowflake. I saw these on Pinterest, and thought they’d be fun to do, and we could use them for Christmas decorations as well. It was a tad tricky to get all the pieces in place before adding glue, but it was fun to do together. Once the glue was dry, we painted it white. For Christmas I plan to add a large snowflake rosette in the centre sourced from the Pazzles Craft Room.
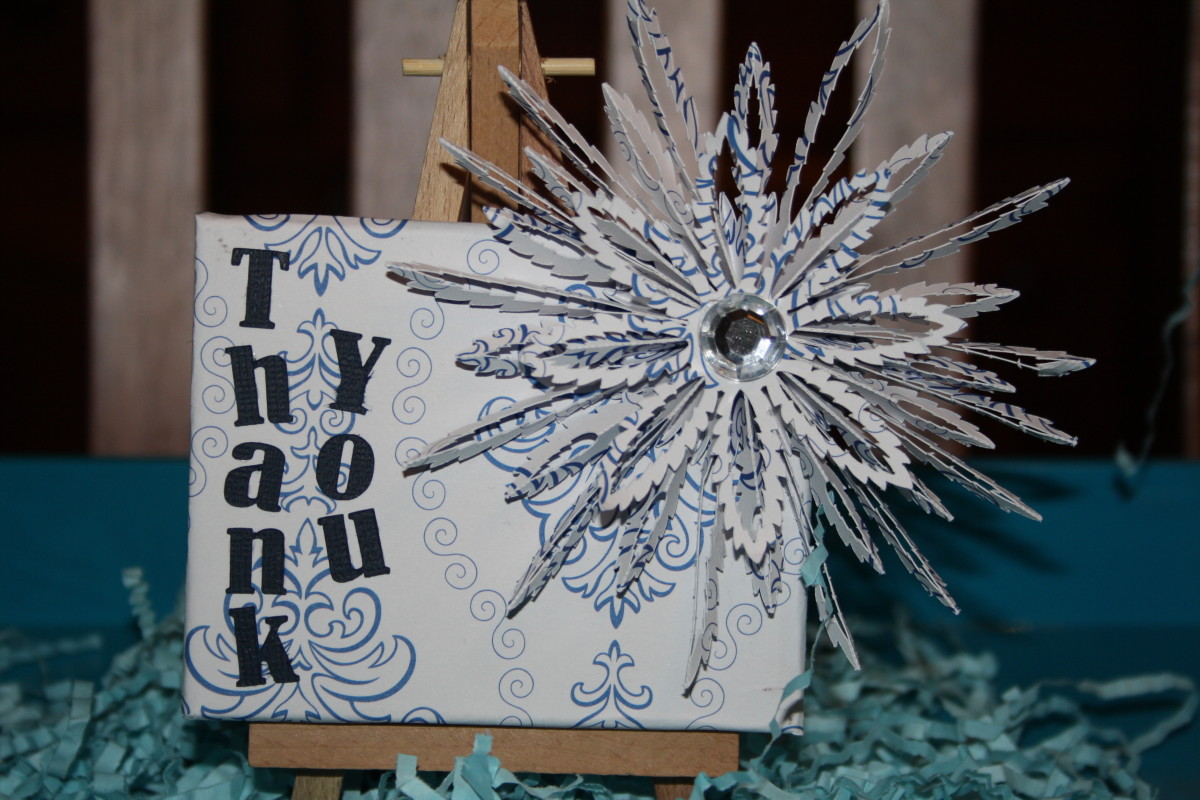
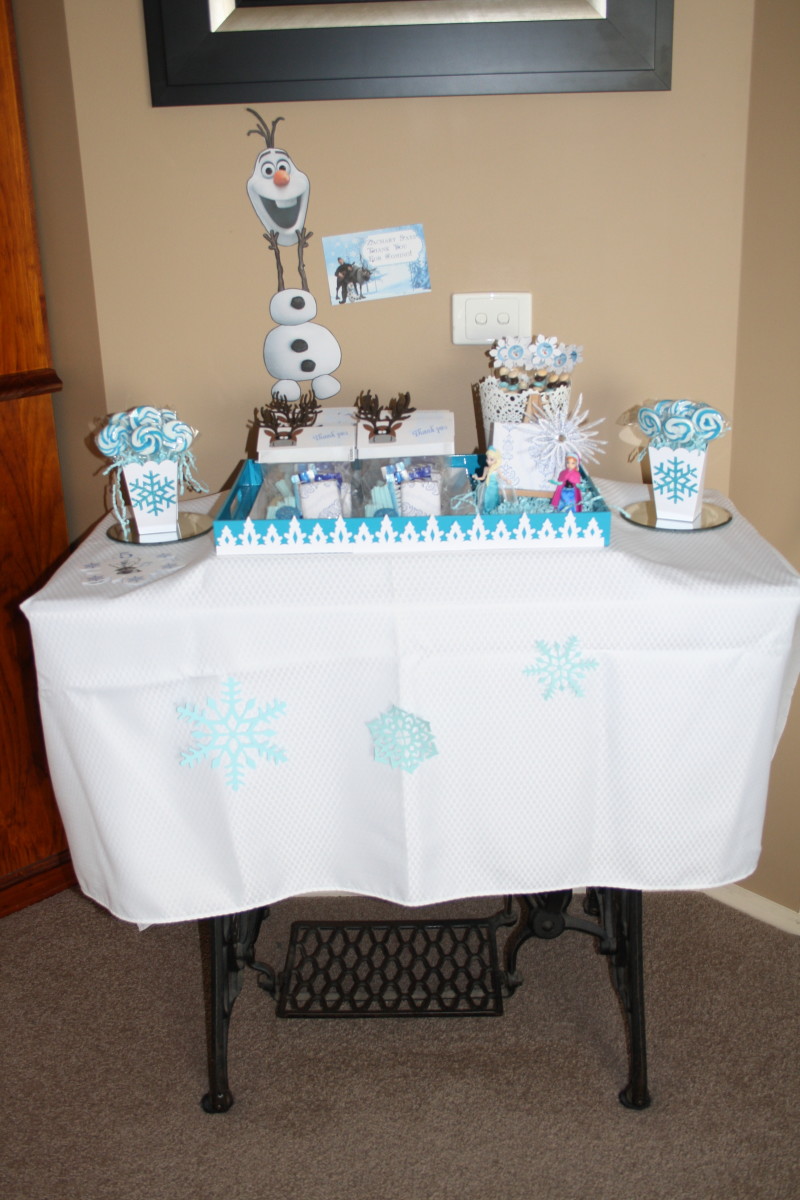
Whilst on the topic of rosette snowflakes, I did cut one out and glued it to a mini canvas I had covered in matching scrapbook paper. This little canvas on it’s mini easel sat on the party favour table. I had planned to add the words ‘thank you’ ready for the party, but had a problem and couldn’t get it done in time. I have since finished it though so you can see the finished product.
Since Zachary’s favourite characters are Sven and Olaf, I wanted to make sure they featured somehow in his party decor. I altered a reindeer file from the Craft Room to create the toppers for the lollie bags. The toppers were just 5cm x 4cm pieces of white cardstock folded over the top base of the cello bag. By attaching it to the base of the bag it means the recipient can easily open the seal from the opposite end without destroying the topper. After gluing the reindeer faces onto the toppers I stamped a snowflake in light blue followed by a ‘thank you’ stamp in dark blue. These bags were well received by Zachary’s friends.
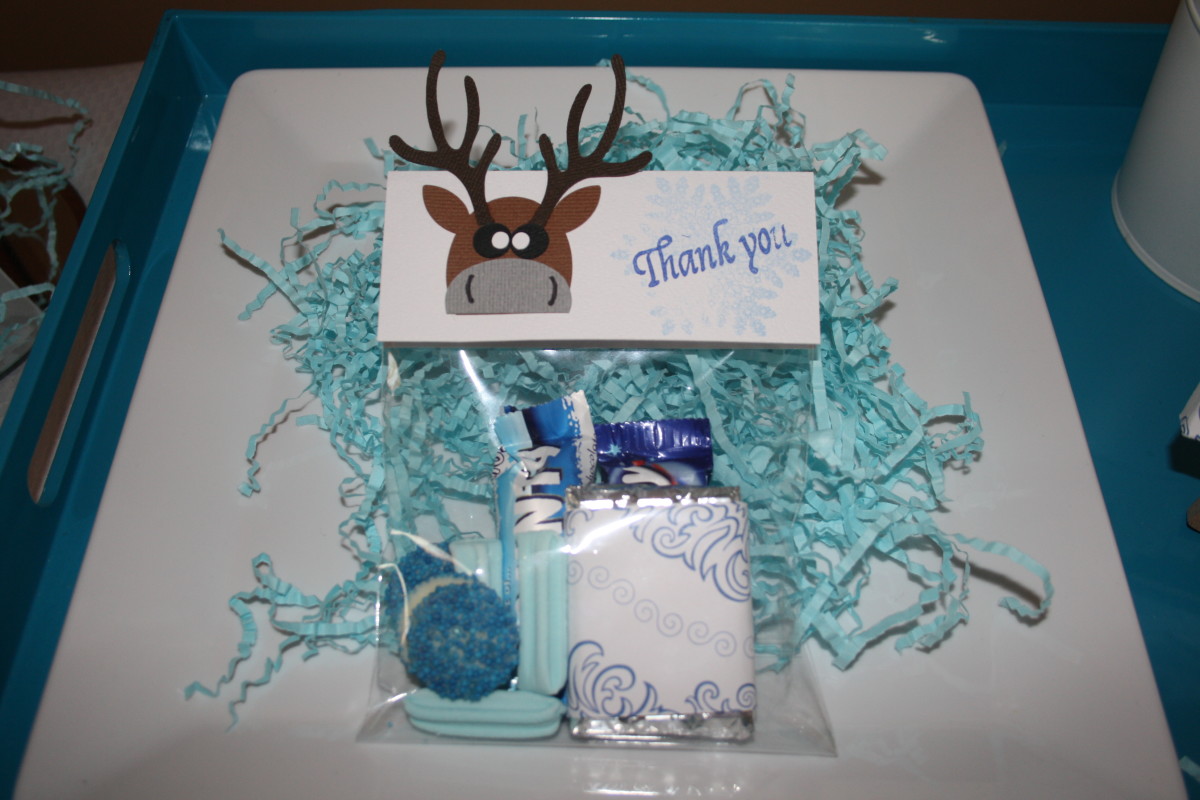
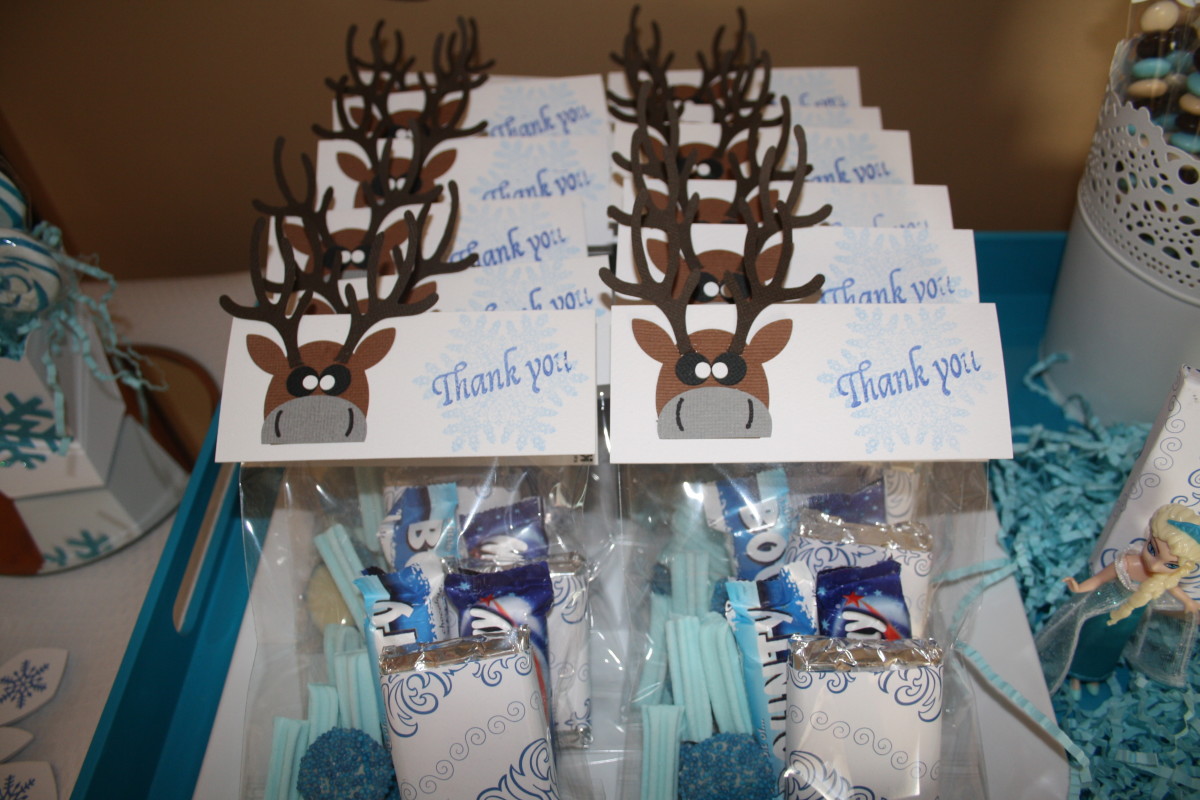
Inside the bags I had made my own white chocolate bars using a Roberts Confectionery mould. The mould has 36 squares of chocolate and so once set and cooled to room temp I cut each block into three equal parts. I then wrapped them neatly in aluminium foil and wrapped a strip of patterned scrapbook paper around it to create custom chocolates.
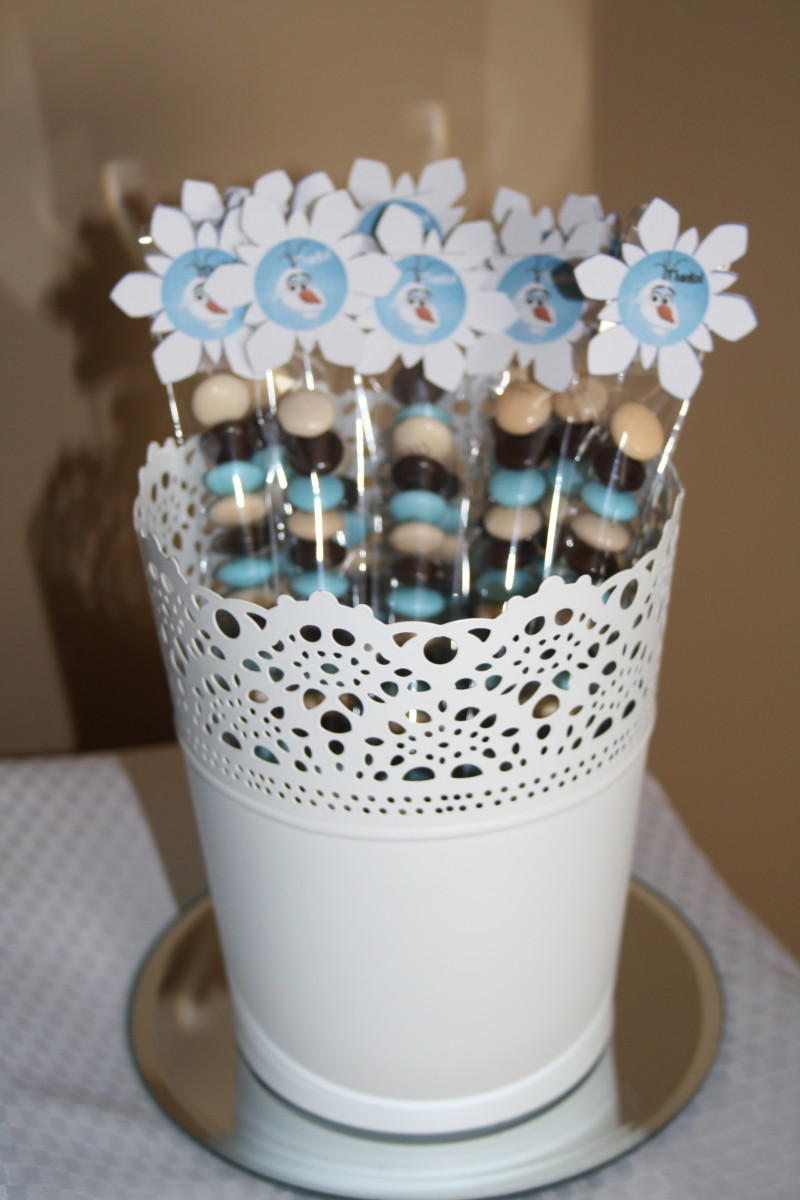
Some new flavoured M&M”s have been released which matched our party theme perfectly – vanilla shake M&M”s which are cream, light blue and dark brown. These were perfect to pop into some small lolly tubes complete with a snowflake topper. I used this snowflake tag file, removing the centre circle. I used the crop photo feature to ‘crop’ Olaf’s face from a saved jpeg image and moved it over the centre of the snowflake. I added the word ‘thanks’ and printed the image onto the snowflakes. I was making these on the morning of Zachary’s party (bad planning on my part!) and made a few silly mistakes which meant they did not come out perfectly. If I wasn’t doing too many things at once this would not have happened! (They still looked cute though).
The popcorn boxes I had already created were perfect for a piece of florist foam and some shredded paper in the top to hold the lollipops. I popped the boxes on top of little round mirrors I found in a $2 shop and thought they looked quite smart.

The party favour table was my Nana’s old 1920’s Singer sewing machine with a white table cloth over the top. I attached a few light blue snowflakes to the table cloth for decoration. I printed the Olaf Build a Snowman activity sheet from the Disney website and attached him to the wall with a little message saying Thank You from Zachary.
The weather was particularly kind to us for the party, so I set up the table outside under our pergola and made use of a simple curtain rod from IKEA to hang a plastic tablecloth from as a backdrop. I hung the paddle pop snowflake from there too.

I purchased two white paper lanterns a while ago with the intent of making a snowman to hang out our front door as Zachary’s guests arrived. One medium and one larger lantern tied together with some embellishments cut out using my Inspiration and later my Vue made him look quite cool! This idea courtesy of Pinterest again! I used the same file I had vectorised for pin the nose on Olaf and cut his raisins out of vinyl and the rest out of cardstock. I folded over the end of his arms slightly before taping them onto the top lantern so they would stand up somewhat. This project was heaps of fun 🙂
THE FOOD
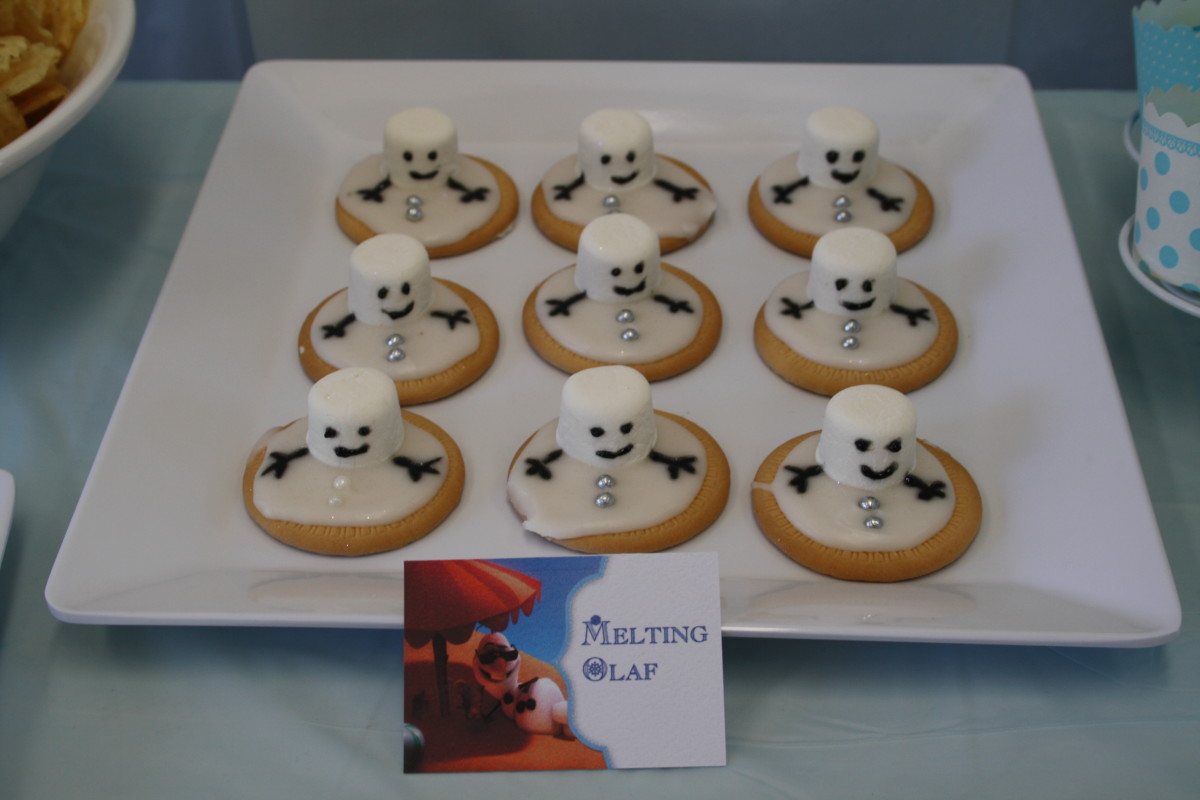
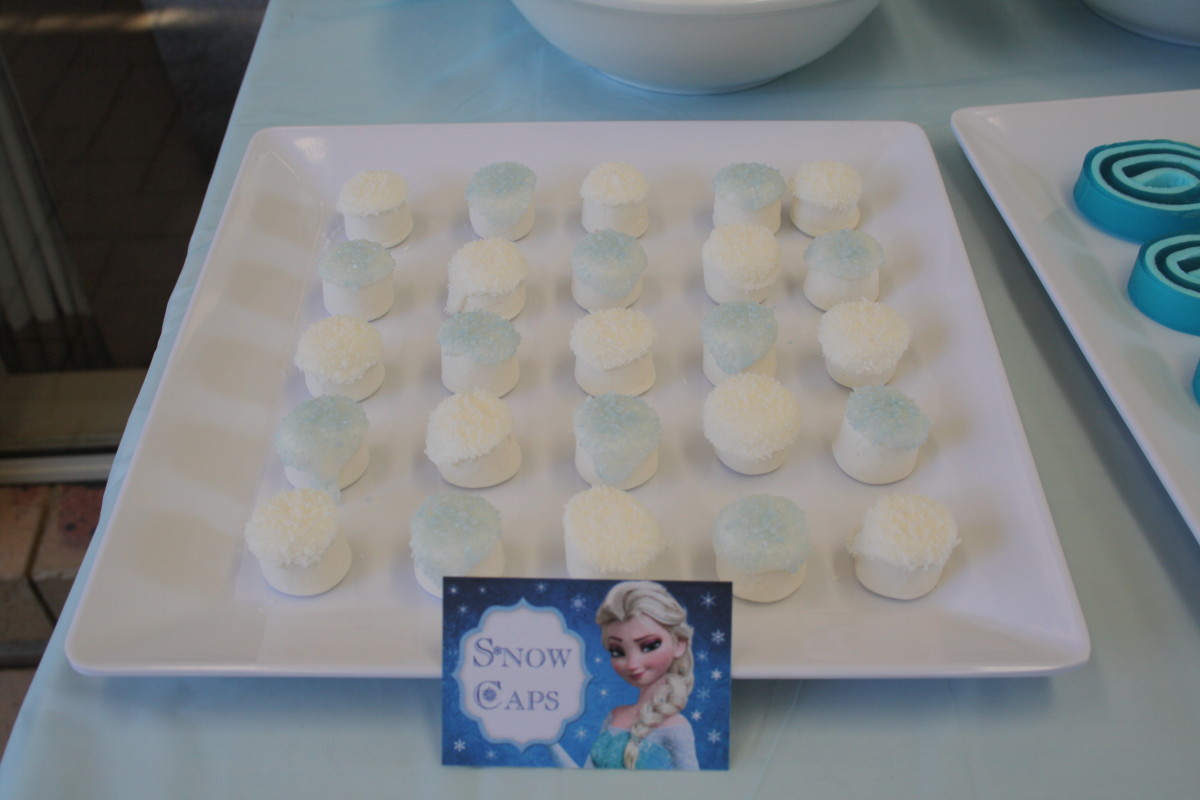
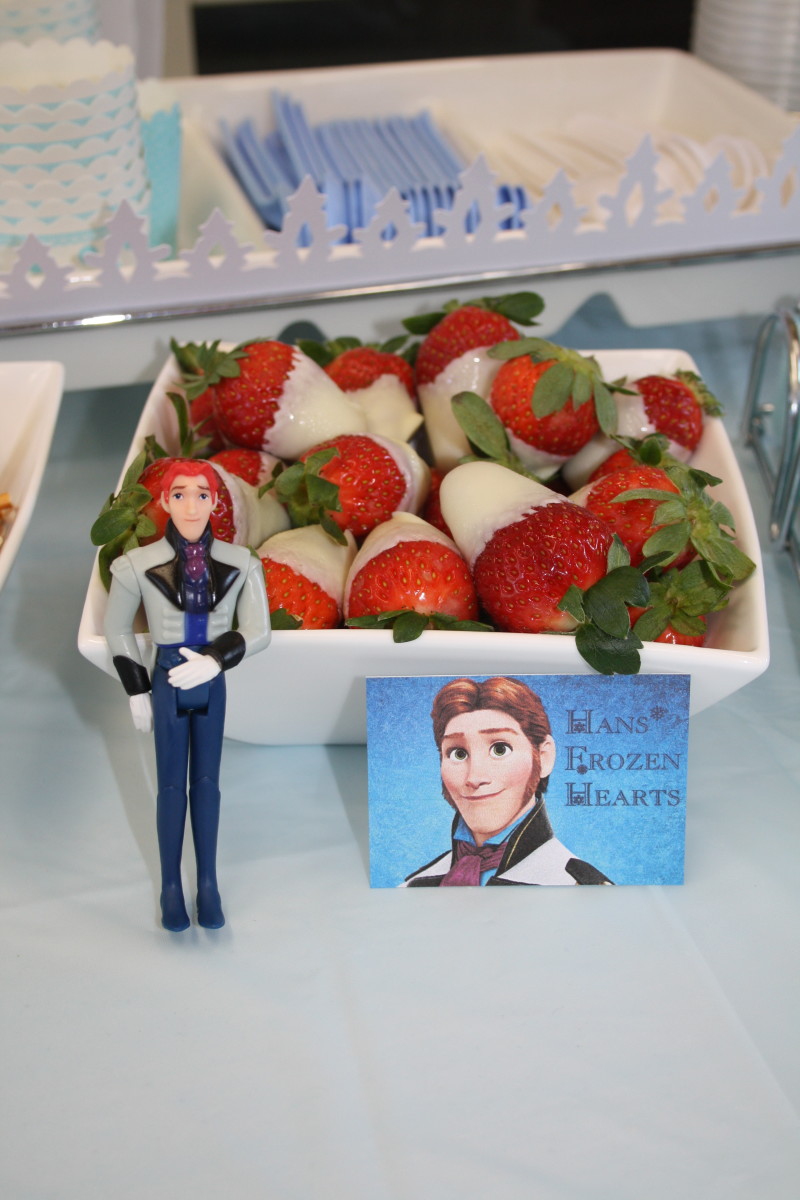
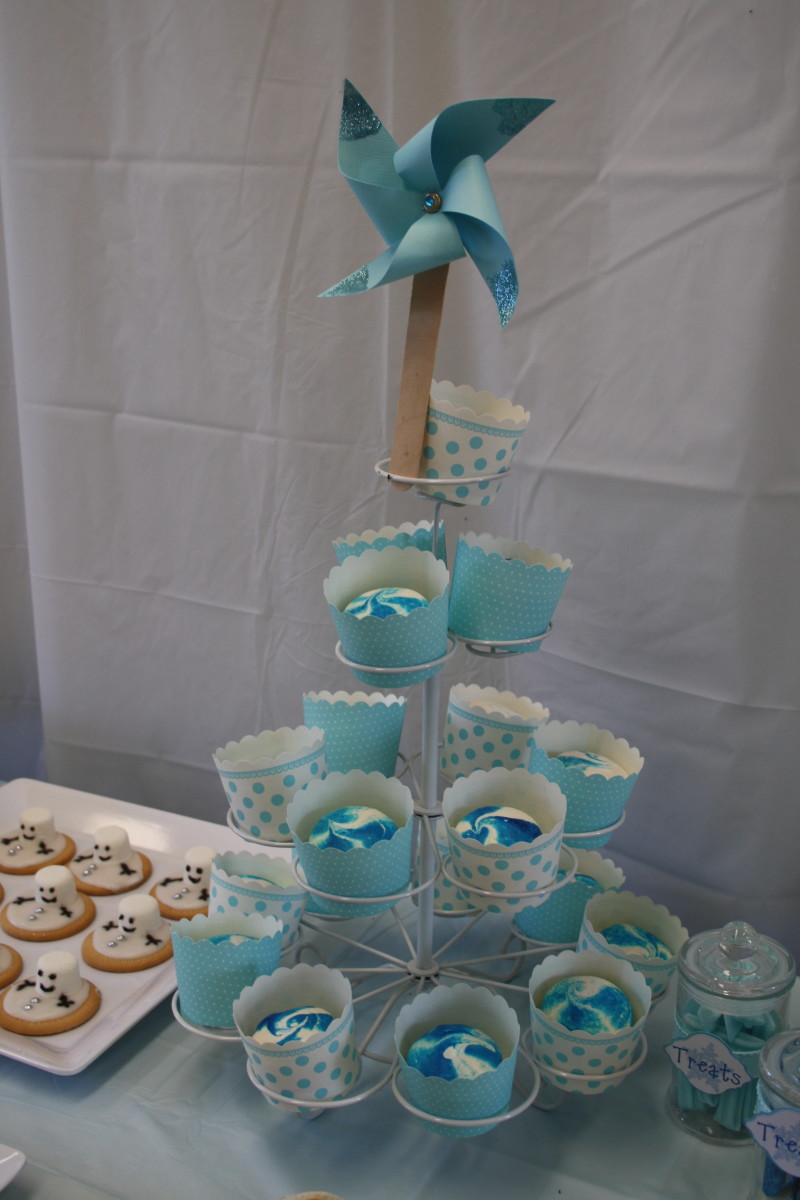
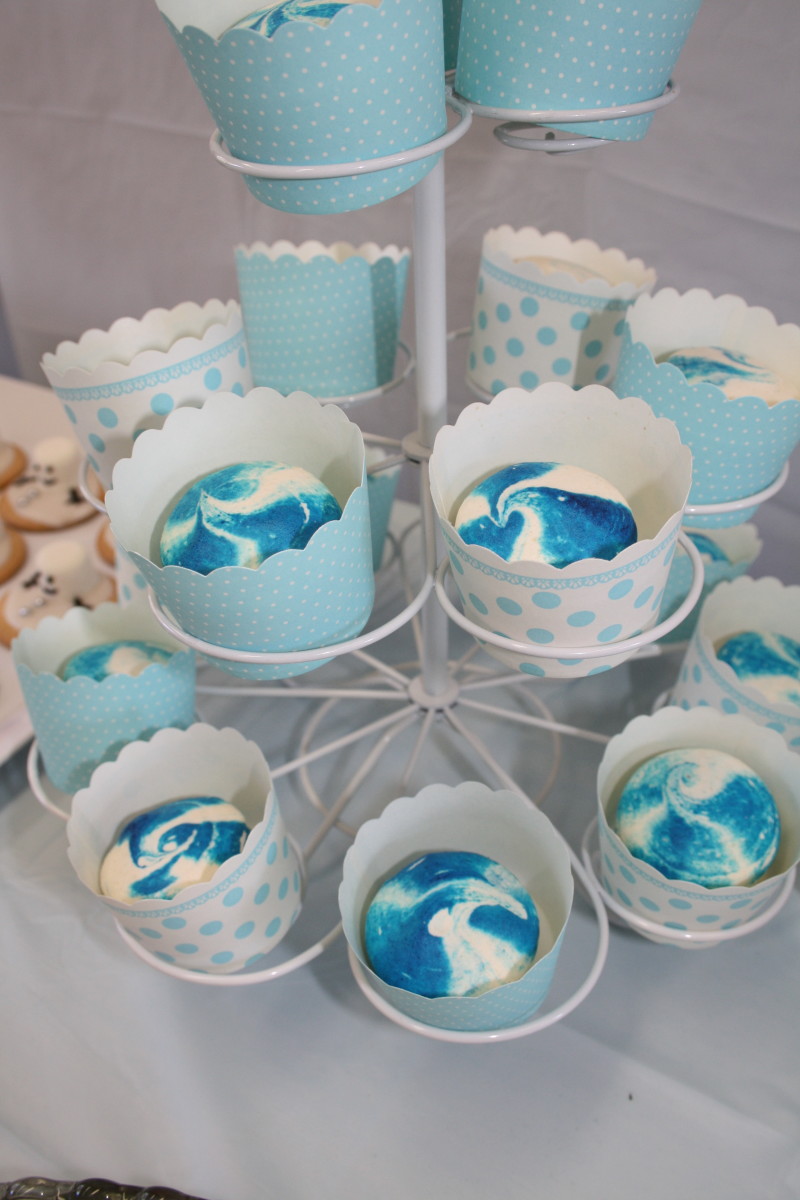
Not only do I love creating crafty things, but I also enjoy creating in the kitchen. With Pinterest as my inspiration centre, I had a few fun things to try out. Each Frozen themed item of food had a corresponding food sign. I used these image for the signs adding text using my Pazzles Software. I’ll just share my images of each food item for you.
MELTING OLAF BISCUITS – marie biscuits with icing and marshmallow head!
SNOW CAPS – marshmallows dipped in icing and then blue sugar crystals and coconut alternatively.
HANS’ FROZEN HEARTS – white chocolate dipped strawberries
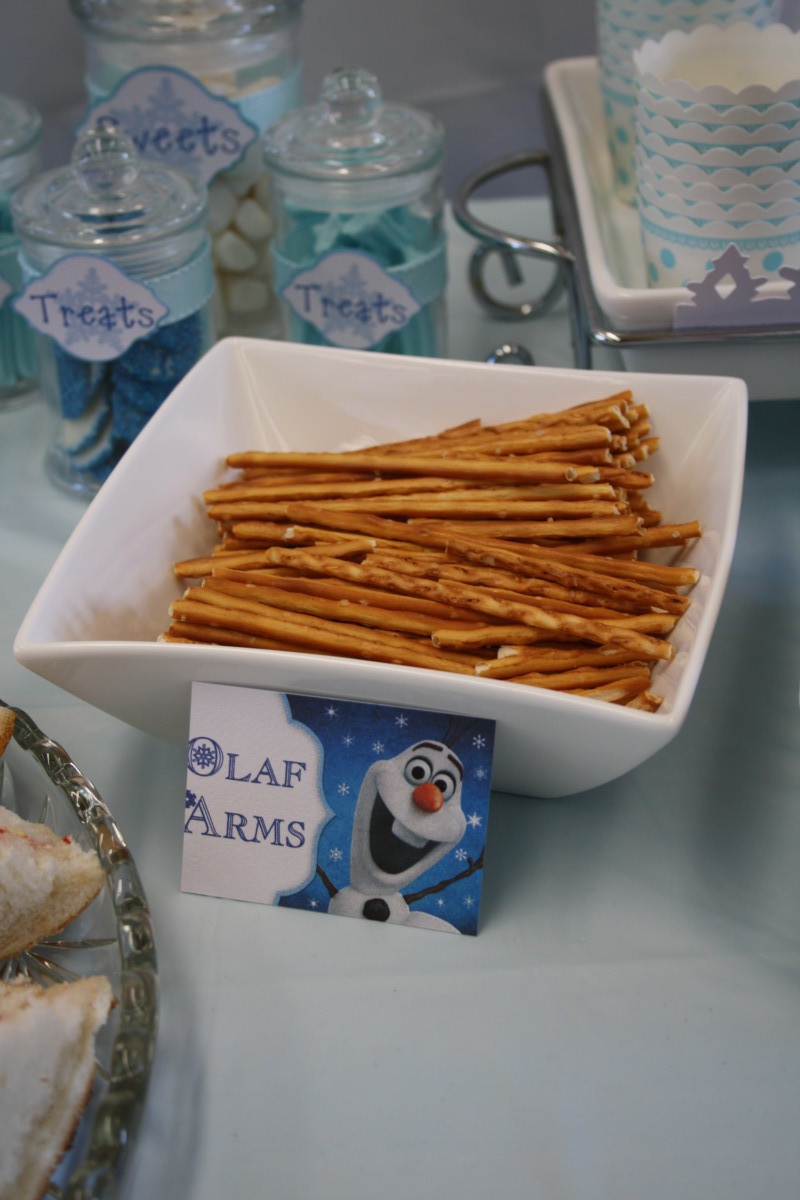
OLAF ARMS – Pretzel sticks
MELTED OLAF – iced water in the drink dispenser with an Olaf head stuck to the glass and a sign saying ‘Melted Olaf’.
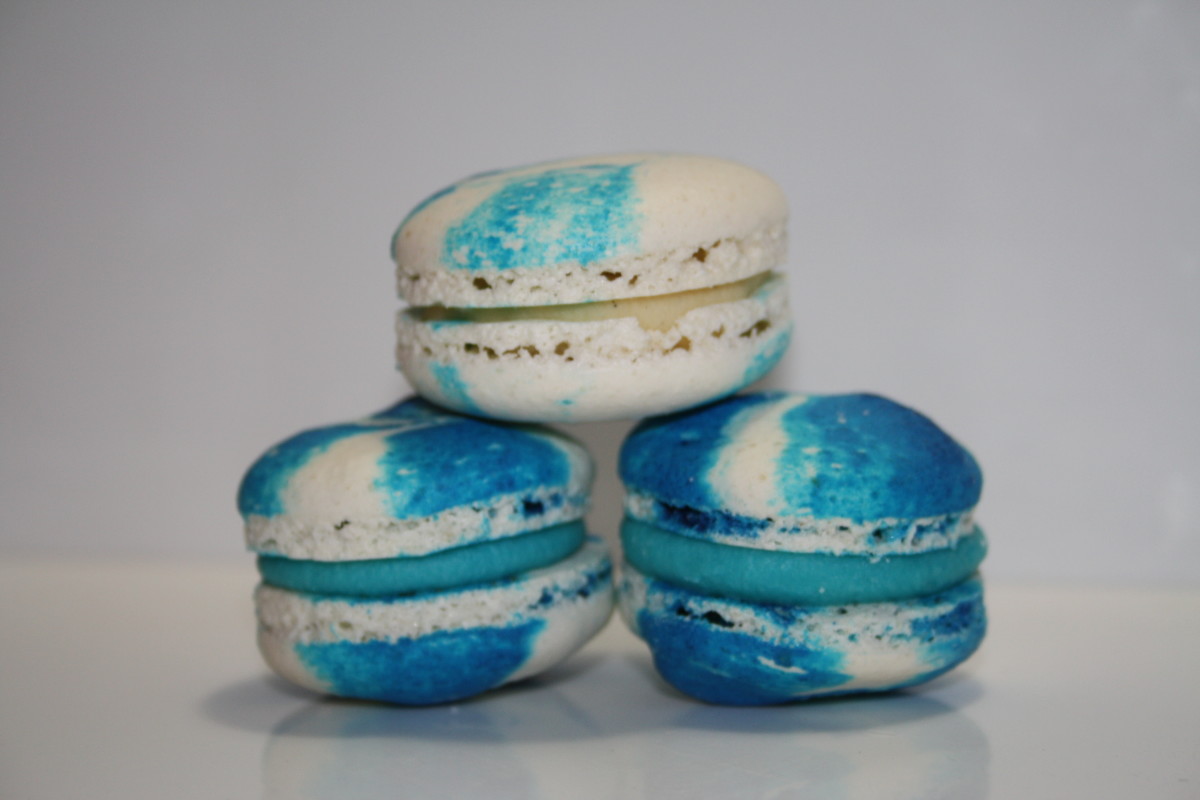
MACARONS – These amazing beauties made by the lovely Lisa from A Macaron Affair are delicious! We had white chocolate ganache in some, and vanilla bean in the others. Lisa coloured the white chocolate ganache blue so we could tell them apart because we had the same shells for both. The blue & white swirl shells made them look great.
OLAF NOSES – Cocktail frankfurts are always a hit at a party with both kids and grown ups!
HANS’ & ANNA’S SANDWICHES – In the song, Love is an open door, Hans & Anna sing about how they finish each others sandwiches.
JELLO PINWHEELS – See recipe here

KRISTOFF’S ICE – Little bowls of jelly, can’t get any easier than that.
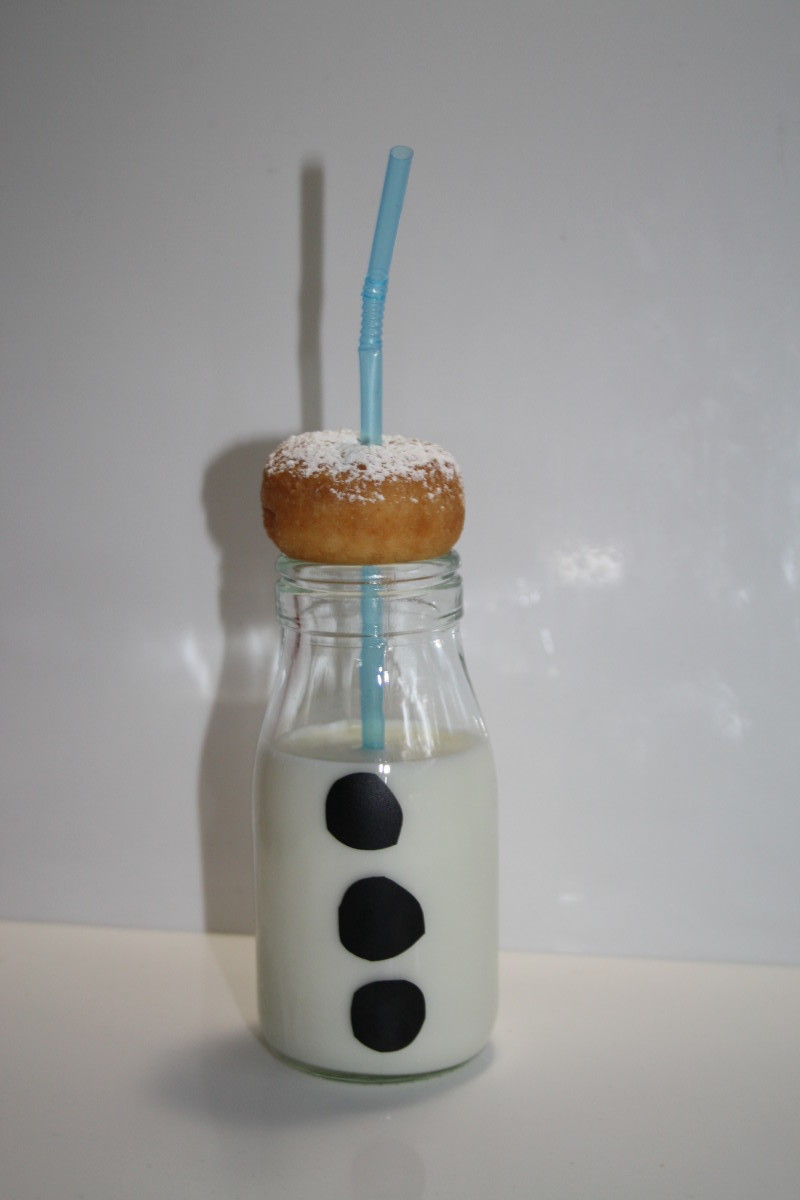
SNOWMAN MILK BOTTLES WITH DOUGHNUT – Milk bottles with vinyl snowman buttons and mini doughnut with icing sugar
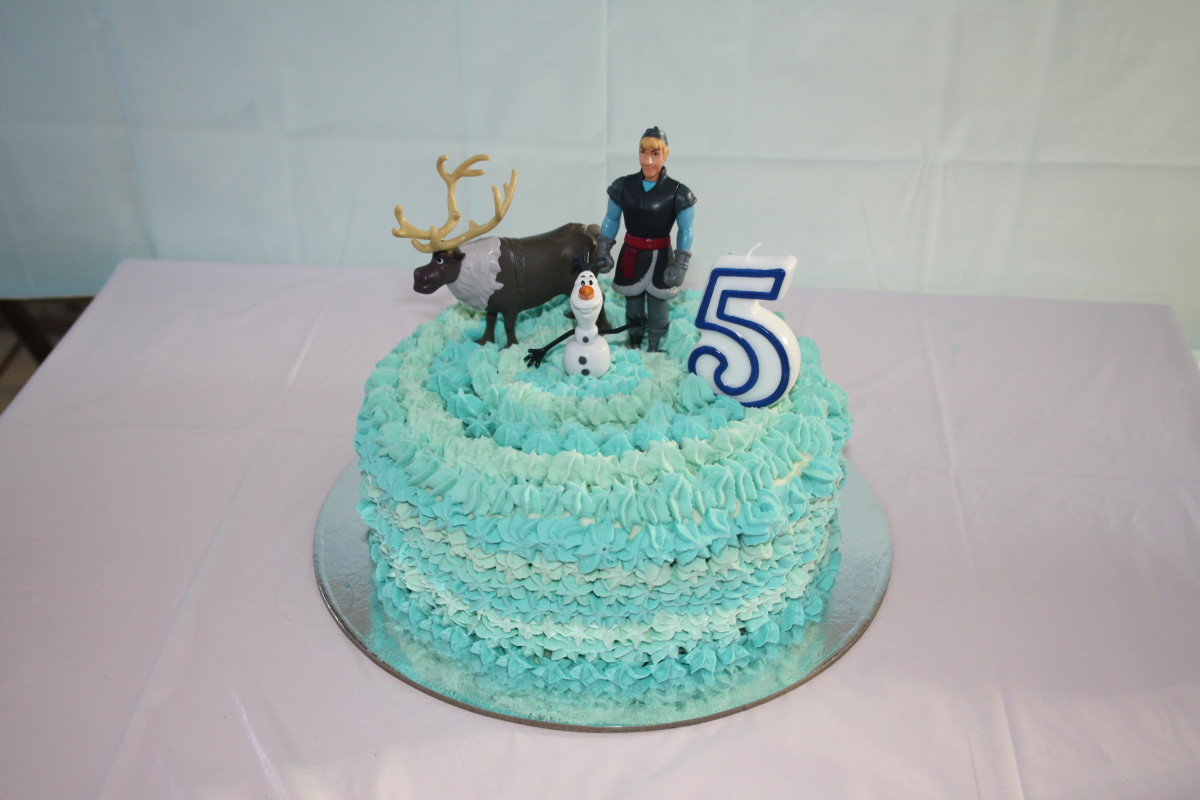
ICE CREAM CAKE –
I had thought about making an ice-cream cake and when I mentioned it to mum she said she’d like to do it. That was before she broke her shoulder and tore her rotator cuff tendon two months ago and has had two surgeries since then to repair it and now on a long road to recovery. That aside, she and dad (who does not cook) worked together to create this!
Dad has NEVER made a cake, let alone iced one. He certainly has not operated a piping bag! Dad piped every little star onto the surface of Zachary’s ice cream cake and I’m super proud of him! He was of course under very close supervision and guidance of mum, who has made many ice cream cakes over the years for my brother & I as children. When we placed Olaf, Sven & Kristoff into the top along with the number 5 candle it looked great.
THE GAMES
Apart from Pin the Nose on Olaf, the children came up with the idea of playing FROZEN statues and hot potato. Hot potato was altered slightly in that we used a white balloon with Olaf’s head stuck on it!
Everyone had a wonderful afternoon and Zachary is still talking about his Frozen party and asking when he gets another one!
Thank you for reading and looking at my pictures. I look forward to sharing more creations with you all very soon.

Absolutely gorgeous Belle, you went to so much effort to style the party beautifully. Thank you for giving A Macaron Affair a chance to be a part of Zachary’s special day. Lisa
Pin the nose on Olaf is hands down my favourite idea here. He looks adorable with noses everywhere and to have him in Zachary’s room later is such a wonderful party momento.
You are so incredibly clever, love it.
Such a fun party!